Using Musette Bags as Saddlebags on a Honda "Super Cub"
Finding saddlebags for a small-frame bike or scooter such as a Super Cub (aka Passport) isn't easy. Most bags are too big, and those that aren't usually don't offer a lot of storage space. Plus, saddlebags are expensive and if you own an old C70 like me, you're probably used to looking for the least expensive (but not necessarily "cheap") solutions.
I found an inexpensive canvas bag that works great as a Super Cub saddlebag: Army surplus Musette bags (official Army designation: M-1936, so named because they resemble a small French bagpipe called a musette). You can find Musette bags online from Army surplus vendors for $10-$15. They're easy to install, rugged, capacious, and appropriately retro looking. They have straps and D-rings that work just like saddlebag mounts.
The following illustrations show how to prepare and install Musette bags on your Super Cub. If you have any questions or suggestions for improvements, please drop me a line on the Honda C70 Yahoo list. And happy riding! --Paul Lagasse
(PS -- I haven't looked into waterproofing the bags yet. I saw a waterproofing spray for nylon once, but I don't know if there's anything out there for use on natural fibers. Maybe lining the bag with something waterproof would work too. Any ideas?)
1. Preparing Musette Bags
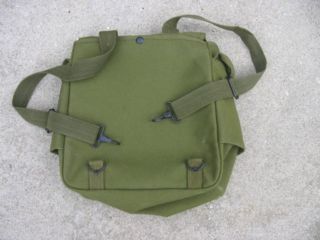 |
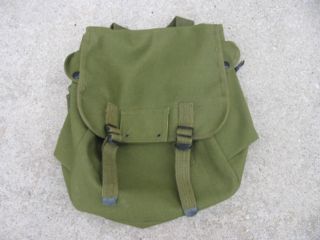
Musette bags are soft, crumply 12x12x4 inch canvas bags with two straps with metal clips and two D-rings on the bottom. In the back is a full-length map sleeve with snap, and on each side is a long snap-flap pocket (good for pens and such). |
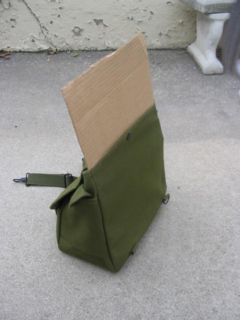
You'll need to give the bag some solidity. Begin by cutting a cardboard (or plastic) sheet to size and slide it into the back map compartment. Snap the map pocket cover closed to keep the panel from coming out while riding. This backboard is important because it works with the nylon straps (see below) to keep the bags clear of the spokes and tires. |
 |
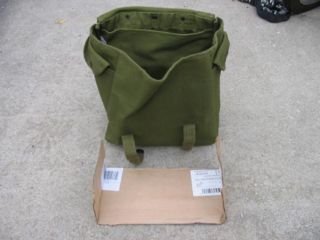 |
Cut and insert a cardboard (or plastic) liner for the bottom and sides of the bag. This is especially important for the right-hand bag to keep it clear of the exhaust pipe. Note that the side liners shown here don't go all the way up the full height of the bag. This allows the bag to look "baggier" when hanging on the bike. |
2. Installing Musette Bags
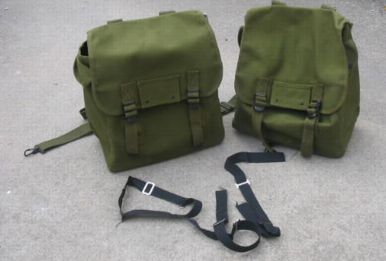 |
Here's the materials you need to mount the bags to the bike: the bags, some nylon strap cut to length, and six "tri-glides" (so that's what they're called!). I bought the strap and tri-glides from American Home & Habitat, Inc. online, but any good straps and fasteners will probably do. |
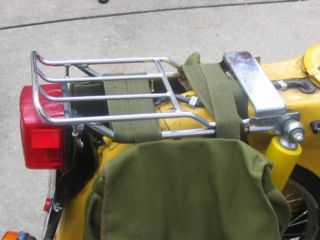
Begin by running the pack straps over/through the rack and then back again to clip on the bag's D-rings. (Clipping the straps to the D-rings on the other bag may work too.) Tighten the straps so that the top of the bag is as high as possible. Note that the mounting procedure may vary depending on the rear rack you have. |
 |
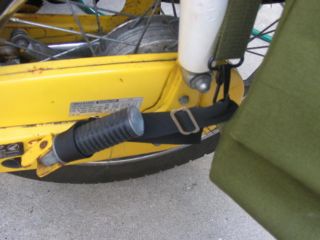 |
Use a length of nylon strap and two tri-glides to attach the front
D-ring to the passenger footpeg. (On the right-hand footpeg I ran the strap through the peg's tie-down ring.) Pull the straps tight. |
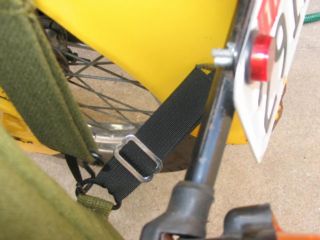
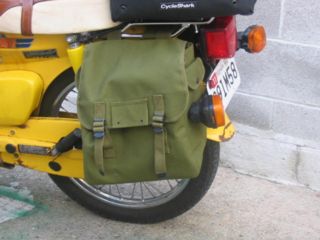
Run another strap over the back fender from the rear D-ring of one bag to the rear D-ring of the other. Pull the strap tight (sorry that this picture isn't too clear). The front and back straps are very important because they keep the bags from flapping in the wind and, along with the backboard (see above), keep the bags out of the spokes and tires. |
 |
3. Completed Installation
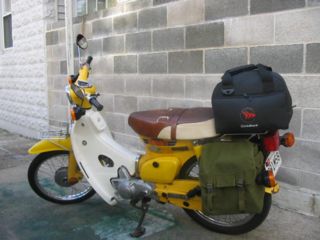 |
Ta daaa! Here's how my bike looks with the bags installed and ready to go. They carry just about anything (if the bottom liner is thick enough) and they look good too. |
Right side. |
 |
 |
Left side. |
Disclaimer: Just because I haven't broken my fool neck yet doesn't mean my idea is 100% safe. Like any other improvised solution involving non-warrantied, aftermarket parts installed by the owner, proceed at your own risk, check the straps regularly, and ride safely, OK?